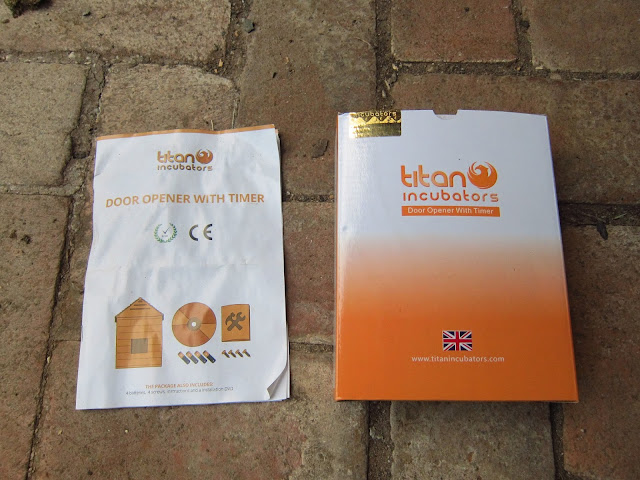
Titan Incubator - Automatic chicken door review
Even though our chickens have a secure run attached to their coop, we still lock them up into their coop at night for extra safety. Now if we didn't have a chicken door, we would have to get up, out of our cosy beds early in the morning to let them out into the run. If you don't, all you'll hear is them complaining from inside the coop (and the occasional scuffle). Cue automatic chicken door. This door can be programmed to open and close at set times, leaving us able to sleep in, or allowing us to go out at night!
We bought our first automatic chicken door from Titan Incubators almost 3 years ago, and our second one about 1 year ago.
I have to admit, the main reason why we bought this brand was price. Even with shipping from the UK, it was cheaper than anything available in Australia that has a controller AND a door kit on runners. We bought it off ebay from Titan incubators. The first one cost us $203.99 and the second $189.99. The price difference was due to the design, one comes with a light sensor and the cheaper one doesn't. In comparison to all the other models, for this price, this was the only one that had the controller and the door kit.
Our first thought was to get the door to open at sunrise and at sunset, hence the version with the sensor. When the kit arrived (it's a pretty big parcel!), we found it as described; a door kit and a controller.
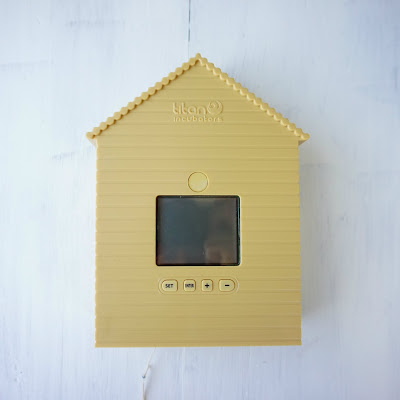
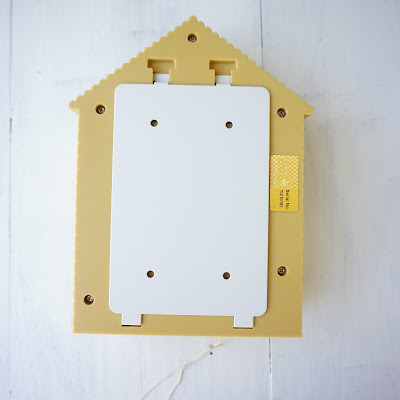
The controller is shaped like a house with a digital display which is sealed behind a sliding panel. The version with the sensor has a little sensor above the display. The panel is backed onto a rubber seal, making the unit weather proof. To access the controls, the front panel has to be taken off. There are 4 buttons that allow you to place your settings. The plus and minus buttons also act as door overrides, allowing you to manually open or close the door. To mount the controller, there are 4 fixing screws (supplied). If you have a metal coop (as most are in Australia), mounting them is slightly trickier. I had to fix a wooden panel on the other side of the coop for the screws to bite into.
 |
| My setup in Penguin's coop. |
The door kit comes with a metal door and runners, plus screws to fix them into place. They come shrink wrapped together, which is useful for marking out the screw fixing points. The door is attached to the controller using some fiddly string and the weight of the door is key to it functioning. During close time, the motor winds down the string, with the weight of the door pulling itself down. The moment it hits a surface, the string becomes slack and tells the motor to stop unwinding. During opening, a slightly different mechanism is used, a knot and a bead. There is a precise knot location in the string, which, when the door is at full open, will push a bead to activate the stop lever in the controller. Confusing? It was for us too!
Anyway, now to the review.
The controller is made of plastic, which is probably OK for the UK, but it didn't look like it would withstand the high UV conditions in Australia. So we moved it to the inside of the coop. This meant that we never tested the light sensor, so I can't comment on it. The location of the buttons on the inside of the panel is annoying. Sometimes a chicken will stop a door (trying to squeeze through a small gap) and you need to manually open or close it. When the front panel is opened, the batteries have a tendency to spring out, and if you are not quick enough to replace them, you will lose all your timed settings. Also, the front panel catches on the battery terminal wires at the top, so you will have to be careful not to break that wire.
What we are noticing after two full years of use, that the battery is being used up faster in our old unit. With fresh batteries put in, the indicator bar will show 1/2 full. It meant that it would just stop working every few months due to no battery power. I think I found out that it was a loose connection and did a quick repair. It went to full battery for a bit, but after a few days, it was back to 1/2 battery. We will see. It most annoyingly will always die on a day you are late for work or it is late at night and you are left with an open door. Time will tell if our second one will start acting up like the first. *update below on this comment
 The door kit is actually excellent. You must remember to put a stop at the bottom of the door kit to put the slack in the string, which can be done using the screw points on the runners. The string/bead issue is a PITA when the string breaks. Re-stringing the unit means taking apart the whole controller. And the strings is a pain to get through that spring bit at the end AND through the small hole. To get the knot/bead position correct, the best advice I can give is to hold the door in the open position, tie the string to it and mark the string at the position where it hits the lever. Then tie your knot at that mark point (making sure you already have the bead in place above the knot). Anyway, there are instructions for this or you could be like me and never read the instructions and just try to figure it out!
So would I buy it again? If I needed another controller and door kit, yes I would. It works, it's just a pain when the days start to get longer or shorter and you have to adjust the opening and closing times, or when you want to manually open or close the door. If the time came for me to buy a new controller, I would probably buy a different brand, one where I can easily change the settings without opening a cover.
Hope you liked my (dusty) pics of the controllers. It's especially useful at night when you have to come back late and you know that your chickies will be safe in their coops. Which leaves you time to cuddle your chickens!
EDIT: May 2017
I bought another door opening kit from Titan Incubators for (yet another!) new coop. It looks like they have listened and have changed the design significantly!
The control buttons can now be accessed without opening the cover! The battery enclosure is at the base of the unit, so again, no need to open the cover. In fact to open the unit, you need to undo four screws at the back. The only time you would need to access the interior is when the string holding the door has snapped and you need to install a new string.
There is also a new mounting bracket for the unit, which can be used as a template for the screw holes. Once the bracket is in place the unit slides in.
Altogether, it is a great improvement on the last design. The Titan door openers are still the cheapest on the market, for both motor and door kit. These improvements make it a very desirable unit indeed.
What has been your experience with these units? Yay or nay?
*update Feb 2018
So with Penguin's controller, we had to solder some connections back together. Basically, the lead connecting the batteries to the control board would keep on disconnecting and the other end of the wire just plain broke off. Once we soldered it back on, we still had that strange 1/2 battery issue, but at least it wasn't just dying on a daily basis. So Penguin's controller works, sort of.
Buffy's controller we noticed had the same problem lead as above, but since his was a newer device, they had obviously seen it as a problem. They just stuck the lead down with a blob of glue 😐
But a new problem has arisen, the controller would just reset. So at night, it thinks it's 11 am in the morning and the door does not need shutting. The battery bar is showing half full (as usual), but maybe it is the new rechargable batteries we put in. Maybe it doesn't like the IKEA batteries?? It has only crept in the past two days, so some more investigation is required.


Comments
Post a Comment